The Final Polish Layer
After writing your patterns and arranging your song, two panels shape how everything sounds as a whole: Mastering (EQ + Compressor) and Master Effects (Filter, Chorus, Delay, Reverb). Together they are the last stage before export — the difference between a rough demo and a finished track.
Part 1 — The Mastering EQ
How the EQ Works
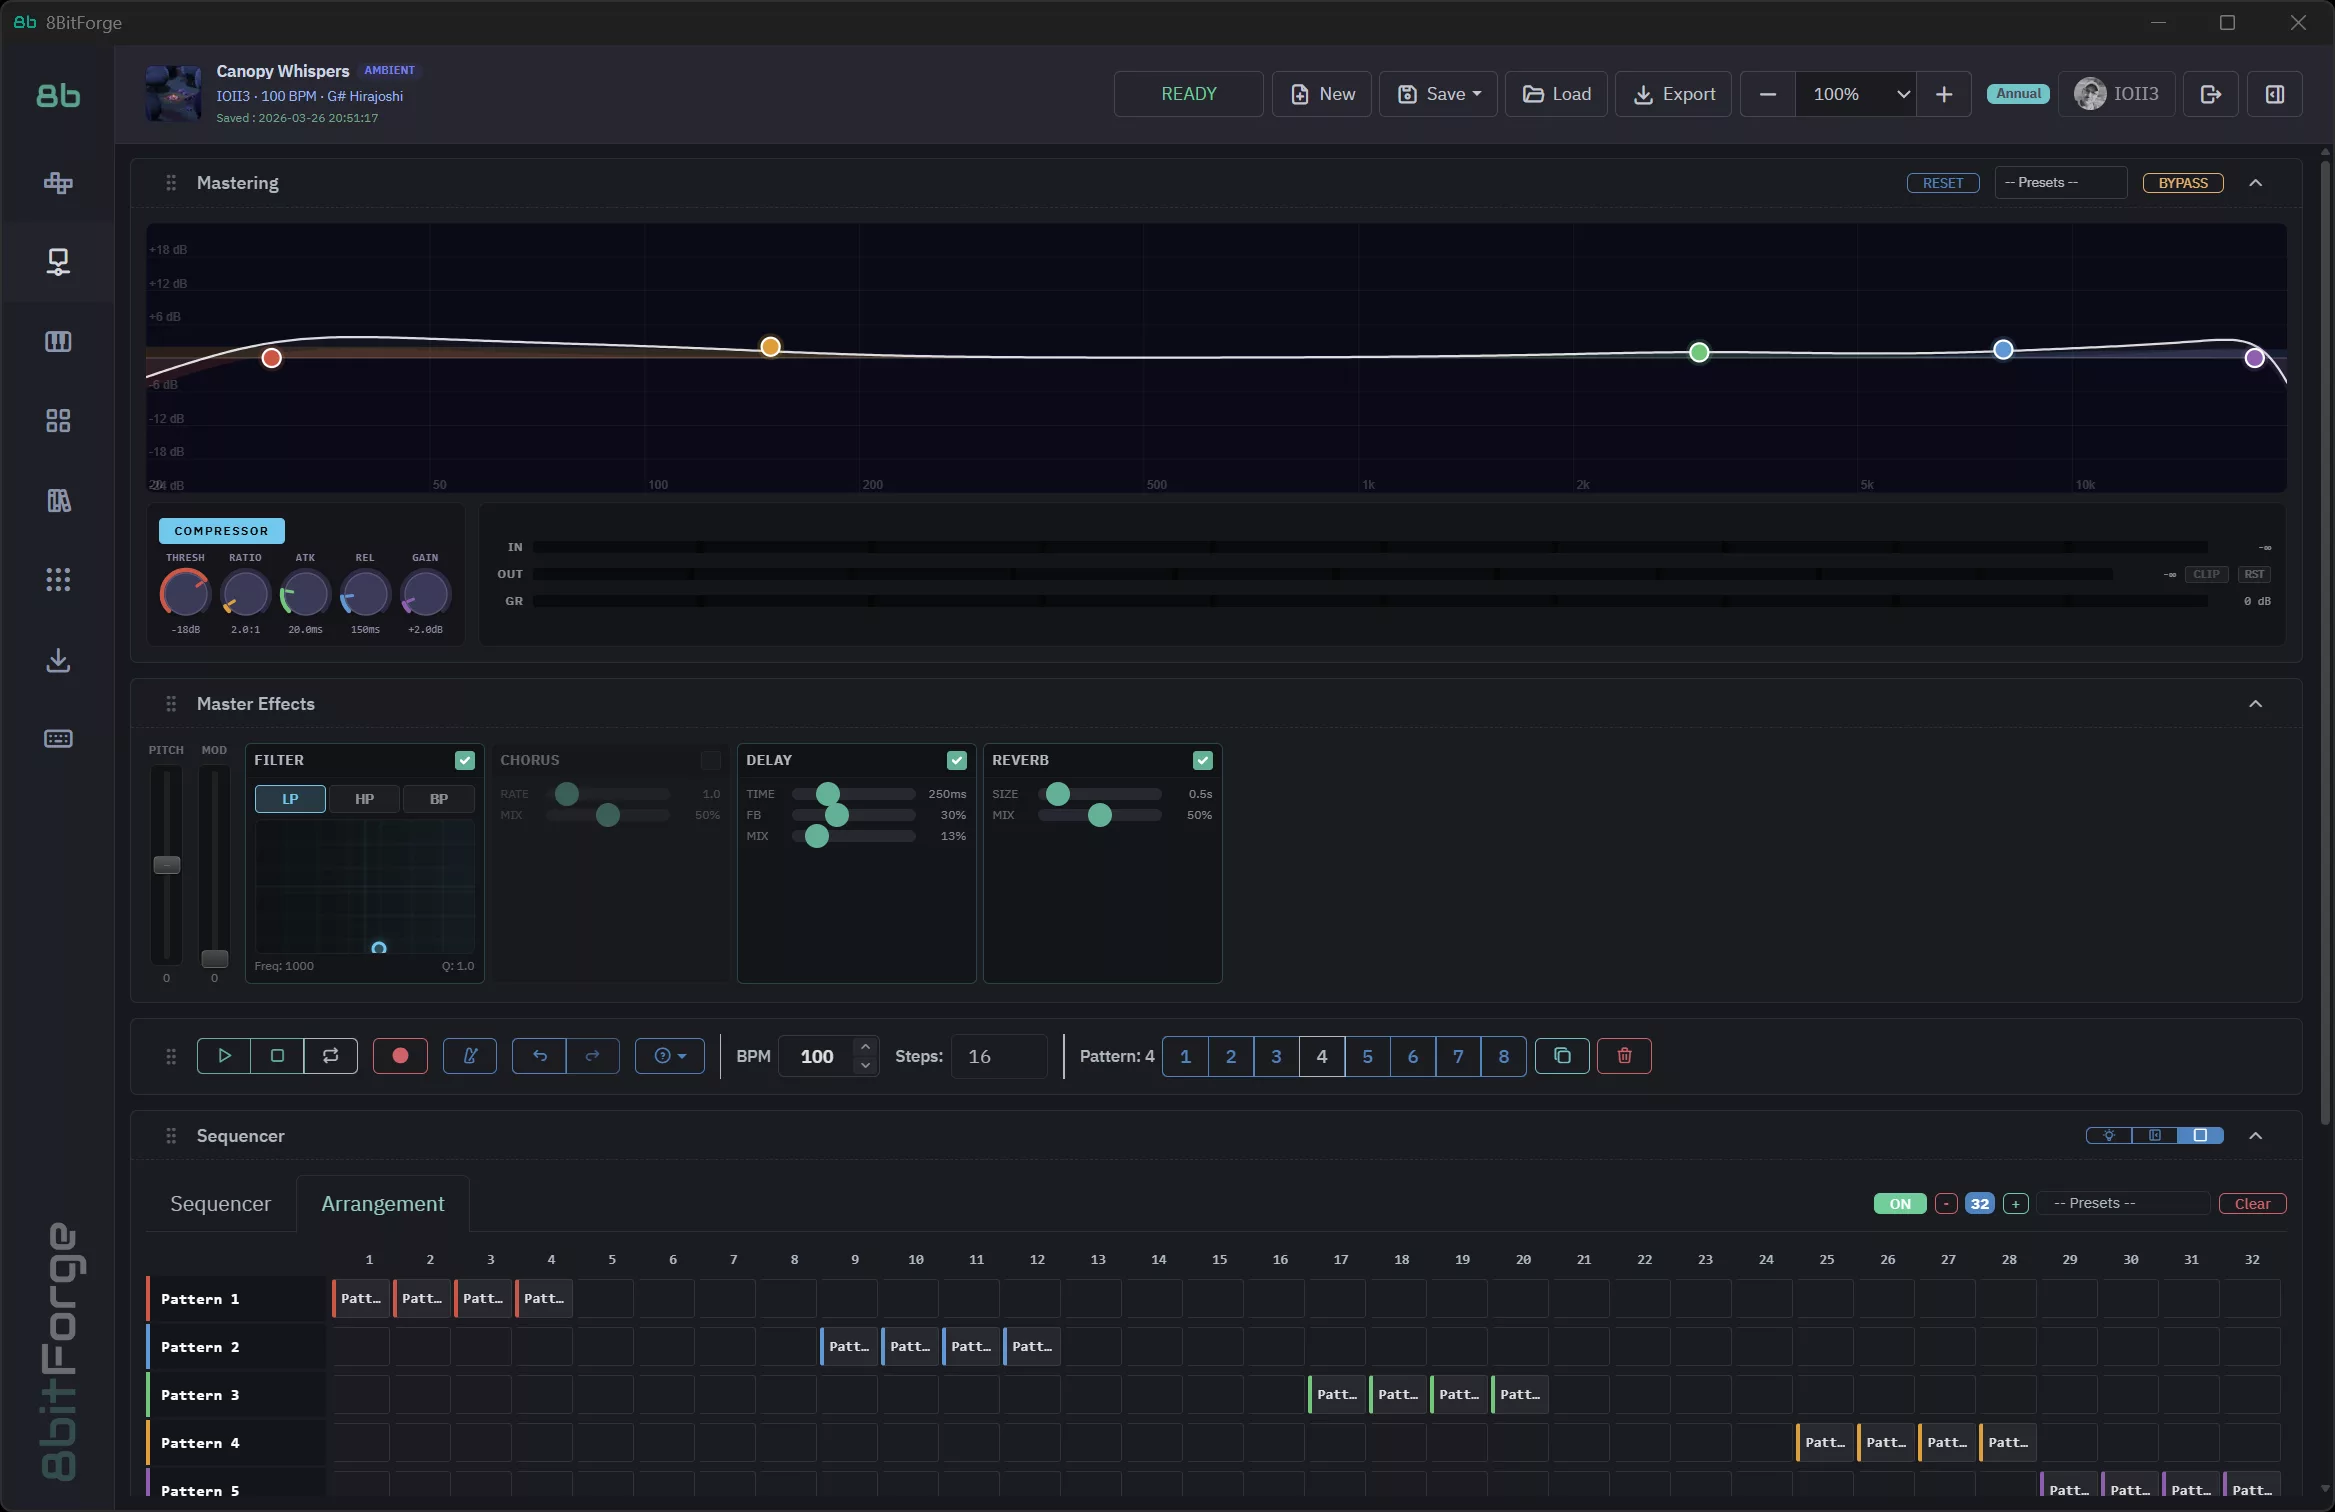
The Mastering EQ is a 5-band parametric equalizer applied to the entire mix. Each band is represented by a colored dot on the frequency curve — drag it up to boost, down to cut. The horizontal axis is frequency (20 Hz to 20 kHz), the vertical axis is gain (−18 dB to +18 dB).
The 5 Bands
- Red — High Pass (20–200 Hz): Cuts everything below the set frequency. Use it to remove sub-bass rumble and clean up the low end. A typical chiptune setting: 30 Hz.
- Orange — Low Shelf (50–500 Hz): Boosts or cuts all bass frequencies below the shelf point. Drag up for warmth, down for tightness.
- Green — Peaking Mid (200 Hz–8 kHz): A bell-shaped boost or cut at a specific frequency. The most surgical band — great for taming a harsh mid or adding presence.
- Blue — High Shelf (2–15 kHz): Boosts or cuts all treble above the shelf point. Drag up for air and brightness, down for a warmer sound.
- Purple — Low Pass (8–20 kHz): Cuts everything above the set frequency. Useful for removing digital harshness or simulating an analog warmth.
EQ Curve Shapes
- Flat: No EQ — the mix plays as-is. Good starting point.
- Smile curve: Bass and treble boosted, mids slightly cut. Classic "loud and exciting" preset for chiptune and electronic music. Low shelf +6, Mid peak −4, High shelf +5.
- Warm: Bass boosted, treble gently rolled off. Great for LoFi and Ambient. Low shelf +5, High shelf −2.
Bypass
Click the BYPASS button in the Mastering header to toggle the entire EQ and Compressor off. A/B between bypassed and processed to hear exactly what the mastering chain is doing to your mix.
Part 2 — The Compressor
The Compressor sits after the EQ and controls the dynamic range of your mix — how much the loud parts differ from the quiet parts. Compression makes your track sound louder, tighter and more cohesive.
The 5 Compressor Controls
- THRESH (Threshold): The level above which compression kicks in. Default −18 dB. Lower it to compress more of the signal, raise it to only catch the loudest peaks.
- RATIO: How strongly peaks are compressed once they exceed the threshold. 2:1 = gentle, 4:1 = moderate, 8:1+ = heavy limiting. Start at 2:1 for transparent glue.
- ATK (Attack): How fast the compressor clamps down after a signal exceeds the threshold. Fast (5ms) = punchless but tight. Slow (30ms+) = punchy transients preserved.
- REL (Release): How fast the compressor lets go after the signal drops back below the threshold. Fast release can sound pumping; slow release is smoother.
- GAIN (Make-up gain): Adds volume after compression — since compression reduces overall loudness, use make-up gain to bring it back up. Watch the IN/OUT/GR meters on the right.
Part 3 — Master Effects Bus
The Master Effects bus adds global effects after the compressor. Every track in your project passes through it simultaneously.
Filter
A resonant filter applied to the whole mix. Switch between LP (Low Pass), HP (High Pass) and BP (Band Pass) modes. Use the XY pad or Freq/Resonance sliders to set the cutoff frequency and resonance. Great for:
- A low-pass filter sweep to build tension into a drop
- A high-pass filter to create a "radio" intro effect
- A band-pass filter for a vintage telephone sound
Chorus
Adds a subtle pitch-modulated doubling effect to thicken the mix. Rate controls how fast the pitch oscillates; Mix controls how much chorus is blended in. Keep Mix below 30% for a subtle widening — higher settings create an obvious wobbly effect, which can work for LoFi and Dream Pop styles.
Delay
A global echo effect on the master bus. The controls:
- TIME: Delay time in milliseconds. 125ms = eighth-note at 120 BPM; 250ms = quarter-note. Sync your delay time to the BPM for rhythmic echoes.
- FB (Feedback): How many times the echo repeats before fading out. 0% = one echo; 50% = several repeating; 80%+ = near-infinite (use with care).
- MIX: How much delay is added to the mix. 10–20% is subtle and adds depth; above 50% the delay becomes a featured effect.
Reverb
Adds a global room or hall ambience to the entire mix.
- SIZE: The simulated room size. 0.1s = tight room; 0.5s = medium hall; 1.0s+ = cathedral. Chiptune typically sounds best with 0.3–0.6s.
- MIX: Wet/dry blend. 20–40% adds natural depth; above 50% the reverb dominates and sounds washy.
Mastering Presets
The Presets dropdown in the Mastering header contains complete presets that configure both the EQ and Compressor at once. These are excellent reference points:
- Chiptune Bright: High shelf boost, tight compressor — punchy and loud
- LoFi Warm: Bass shelf up, treble rolled off, gentle ratio
- Ambient Space: Mid dip, high pass at 30Hz, slow attack to preserve transients
Load a preset, press Play, then adjust the dots on the EQ curve to taste.
What's Next?
- Mixer → balance individual track volumes, EQ and effects before the master chain
- Export → render your mastered mix as WAV or MP3
- Mixer Automation → automate filter sweeps and volume fades in the arrangement timeline
Happy mastering! 🎮